Project Status
Personal | In Progress
Skills Demonstrated
Illustration, 3D Modelling/Sculpting, Concept Art, Copywriting
Tools Utilised
Procreate, Nomad Sculpt, Photoshop
Welcome to Harikoa - the happiest island on earth!
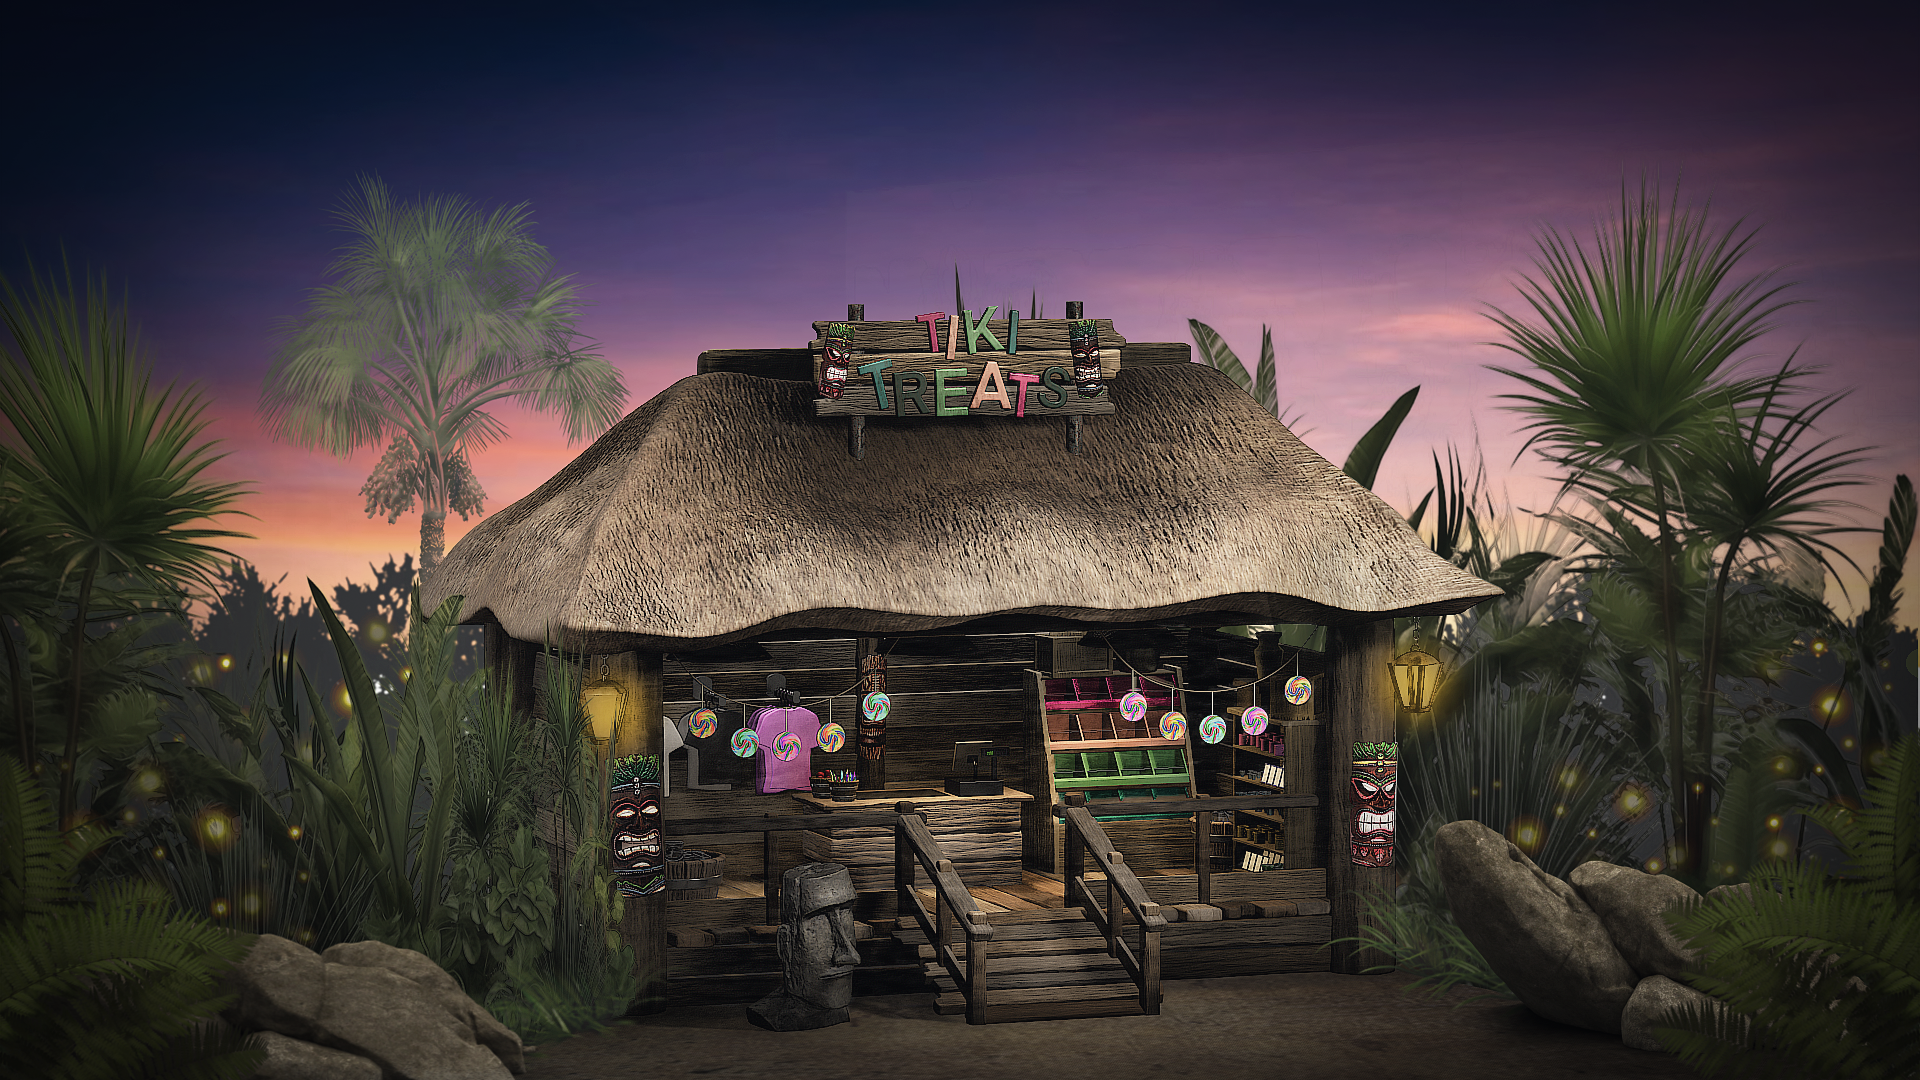
Hidden within the vibrant Harikoan hues lies Tiki Treats - a joyous place for islanders and visitors alike. Famous for their traditional wooden and stone mask carvings, Tiki Treats has been in the Akana family for generations and business is booming! They're always waiting to greet friends new and old with a smile - embodying the Harikoan belief that a single smile can change the world. Drop by and treat yourself, it’s another beautiful day on the island!

Tiki Treats - Concept Art
Design Development
Step 1: Initial Illustration
I created a front profile illustration of the building using Procreate.
I tend to gravitate toward a front profile for the initial drawing (when applicable) as it allows me to communicate a large amount of design intention simply and quickly.
As the building has an open frontage, I felt I could sufficiently communicate the concept using a single illustration - packing in enough information to inform the 3D modelling process.
![Tiki Treats - Initial Illustration (Front Profile) [Procreate]](https://cdn.myportfolio.com/207dcec1-e053-4e58-8cec-63134db7c2c2/53f54156-2123-4ba1-999b-e79750ad96d7_rw_1920.png?h=8c0bc87c04e1167bdc42e98586a1df1b)
Tiki Treats - Initial Illustration (Front Profile) [Procreate]
Step 2: 3D Blockout
I used Nomad Sculpt to block out the structure of the store - informed by the initial illustration.
This helped me firm up the sense of scale for the store, as well as gaining a greater perspective into how different furnishings and theming would occupy the space in their most primitive form.
![Tiki Treats - Blockout #1 [Nomad Sculpt]](https://cdn.myportfolio.com/207dcec1-e053-4e58-8cec-63134db7c2c2/7d44fcd2-b95c-4327-953f-edf981ea69cf_rw_1920.png?h=5a4eae8d872573619c0d16d05e0c0e90)
Tiki Treats - Blockout #1 [Nomad Sculpt]
![Tiki Treats - Blockout #2 [Nomad Sculpt]](https://cdn.myportfolio.com/207dcec1-e053-4e58-8cec-63134db7c2c2/b3ab229d-b5b0-4646-80a6-06d4df249d96_rw_1920.png?h=bb761e1c376cc41606953561ee048ed8)
Tiki Treats - Blockout #2 [Nomad Sculpt]
Tiki Treats - Blockout (Turntable) [Nomad Sculpt]
Step 3: Texturing & Detail
When texturing the model, I opted for a stylised aesthetic.
As I intended to composite the model into a ‘painterly’ style environment at a later stage, this helped maintain stylistic continuity moving forward.
I see a particular benefit in the use of stylised imagery at this stage of a project development cycle, as this approach clearly illustrates the use of aesthetic of the store, without fully establishing a real-world expectation in regards to material selection and construction at such an early stage.
![Tiki Treats - Texture & Detail #1 [Nomad Sculpt]](https://cdn.myportfolio.com/207dcec1-e053-4e58-8cec-63134db7c2c2/3e754a50-79c9-4faa-a3dd-36c39d2b0d41_rw_1920.png?h=046d92d8f91f53d18fd289f78a3c5b49)
Tiki Treats - Texture & Detail #1 [Nomad Sculpt]
![Tiki Treats - Texture & Detail #2 [Nomad Sculpt]](https://cdn.myportfolio.com/207dcec1-e053-4e58-8cec-63134db7c2c2/5fac3720-903b-4464-b08e-05f480d86875_rw_1920.png?h=d0d51e389487c61e9322706a8e863479)
Tiki Treats - Texture & Detail #2 [Nomad Sculpt]
Step 4: Concept Art & Post-Processing
I started the initial photobash in Procreate.
I prefer starting this kind of work on the iPad where possible, as I feel it helps me remain focussed on the fundamentals of the image composition - rather than getting too deep into details and settings too early on in the process.
Once the composition has taken shape, I transfer it into Photoshop for some final touch-ups, filtering, and post-processing (Unsharp Mask, LUT’s, etc.).
![Tiki Treats - Initial Composition [Procreate]](https://cdn.myportfolio.com/207dcec1-e053-4e58-8cec-63134db7c2c2/eca49fc6-f79e-435d-96df-9f597446b4ff_rw_1920.png?h=5a04d541754171e5cebcd340575a08fe)
Tiki Treats - Initial Composition [Procreate]
![Tiki Treats - Finishing Touches [Photoshop]](https://cdn.myportfolio.com/207dcec1-e053-4e58-8cec-63134db7c2c2/f55c9078-8e92-4181-ada0-9ac4a2e062ca_rw_1920.png?h=53934446c6e8d322c04f74e42aadce4a)


